


Crushed blacks happen when near-black shadow tones collapse into pure black, hiding texture in dark jackets, night scenes, hair, walls, or game environments. The cause is usually not the video file alone; it is often a mismatch between black level, gamma, HDR tone mapping, panel contrast, and room lighting.
Black Crush Starts With Lost Shadow Steps
Video shadows are not supposed to be one solid block. A well-tuned display should show separation between black and very dark gray, especially in mastered movie footage and cinematic game scenes.

The fastest check is black level. If it is set too low, dark detail disappears; if it is too high, blacks turn gray and contrast feels weak. Calibration guidance for near-black test patterns is simple: the darkest bars should be barely visible, not completely merged.
Gamma is the next lever. A higher gamma curve can make the image look punchier, but it also darkens midtones and shadows. For most SDR video and PC use, gamma 2.2 is the practical starting point; dim-room movie viewing may favor deeper gamma, but only if shadow detail survives.
Signal Range Mismatch Is a Common PC Problem
One of the most frustrating causes is a range mismatch: your GPU sends one black-level range while the monitor expects another. Full RGB and limited RGB can both look correct, but they must match across the playback device and display.
When they do not match, the image can become washed out or crushed. PC users should check the GPU control panel output range, monitor input black level, operating system HDR behavior, and player settings before assuming the panel is defective. A user discussion about black-crush risk highlights this exact issue.

Quick checks:
- Set the native resolution and correct refresh rate.
- Use the GPU output, not the motherboard port.
- Match full range to full range, or limited to limited.
- Disable extreme “Vivid,” “Cinema,” or FPS enhancer modes.
- Test SDR and HDR separately.
HDR Can Help, But Weak HDR Can Crush Detail
HDR is designed to expand shadow and highlight range, but the badge alone does not guarantee better footage. If a monitor lacks real brightness headroom, accurate tone mapping, or effective local dimming, HDR can make dark scenes look heavier instead of more detailed.
Basic HDR monitors often struggle because the display cannot follow the intended brightness curve cleanly. That is why HDR quality depends heavily on the monitor model, not just the setting being enabled.
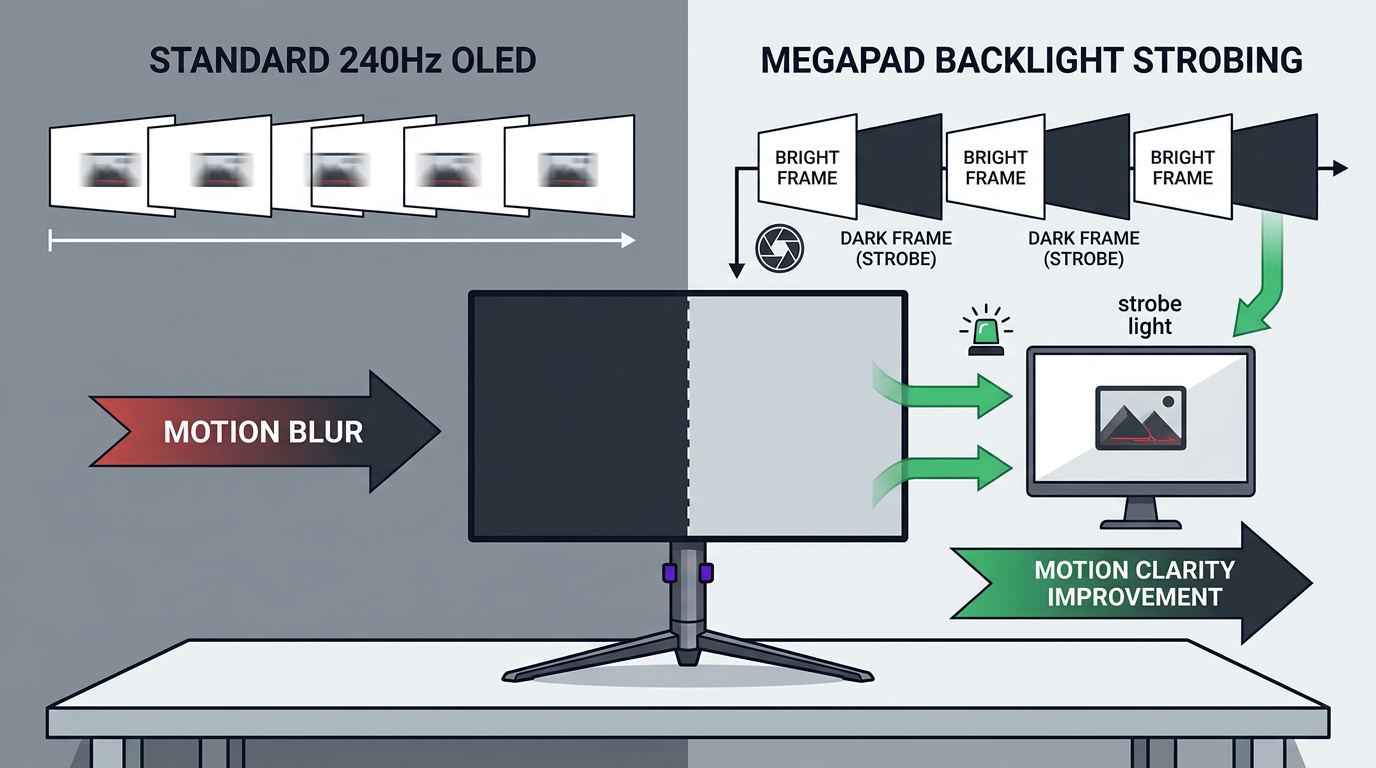
OLED, VA, and IPS panels also behave differently. OLED can produce true blacks, VA often delivers stronger native contrast, and IPS may show weaker black depth or glow in dark rooms. A high-contrast panel is an advantage, but poor settings can still bury near-black detail.

OLED’s deep black floor can look spectacular, but it also makes incorrect gamma or HDR tone mapping more obvious.
Your Room and Picture Mode Change What You See
A display calibrated in a bright office may look too dark at night, while a dim-room setup may look washed out in daylight. Ambient light, glare, and screen brightness all change perceived contrast.

For video, start with a neutral picture mode such as User, Custom, Standard, or sRGB if it gives you control. Avoid aggressive presets that boost contrast, black equalizer, or saturation unless you are optimizing for competitive visibility rather than faithful footage.
Color temperature matters too. A Warm preset usually gets closer to natural video balance, while Cool modes can make the image look thin and harsh. Proper setup also helps comfort during long sessions, since poor screen use can contribute to digital eye strain.
A Practical Fix Order for Better Shadow Detail
Do not fix crushed blacks by blindly raising brightness. Brightness often changes the backlight, not the video signal’s shadow mapping, so it can make the whole image flatter.
Use this order instead:
- Reset the input’s picture mode to a neutral preset.
- Confirm native resolution, refresh rate, and GPU connection.
- Match RGB range or input black level across devices.
- Set gamma around 2.2 for SDR, then test dark scenes.
- Adjust black level until near-black detail barely appears.
If footage still crushes after these steps, compare the same scene on another known-good display. If only one monitor fails, calibration, firmware, panel limitations, or HDR tone mapping may be the real bottleneck.


